Getting Started with PraxisMS
New to PraxisMS? This guide will walk you through everything you need to know to get up and running quickly.
What is PraxisMS?
PraxisMS is a time tracking and team management platform designed for businesses of all sizes. Whether you're a freelancer tracking billable hours or a company managing dozens of employees, PraxisMS provides the tools you need to:
- Track time accurately with real-time timers or manual entries
- Generate reports for payroll, job costing, and productivity
- Manage your team with flexible permission levels
- Organize work with optional Job Costing and Task Manager modules
Creating Your Account
Joining an Existing Company
If your employer uses PraxisMS, they'll send you an invitation email. Here's what to do:
- Check your email for an invitation from PraxisMS
- Click the Accept Invitation link in the email
- Create a password for your account
- Complete your profile information
- You're ready to start tracking time!
Can't find the invitation email? Check your spam folder, or ask your administrator to resend the invitation.
Creating a New Company
Starting fresh? You can create your own company account:
- Visit praxisms.ca/register
- Enter your company name and your contact information
- Choose a password (minimum 8 characters recommended)
- Verify your email address
- You'll be the Billing Administrator with full access
New companies get a 7-day free trial with full access to all features. No credit card required to start. Add a payment method anytime to continue after the trial.
Your First Login
When you log in for the first time, here's what you'll see:
Complete Your Profile
Before diving in, take a moment to set up your profile:
- Click your name in the top-right corner
- Select My Profile
- Add a profile picture (optional but recommended)
- Verify your name and email are correct
- Set your timezone if different from your company's default
Your email address is used for password recovery and notifications. Keep it up to date!
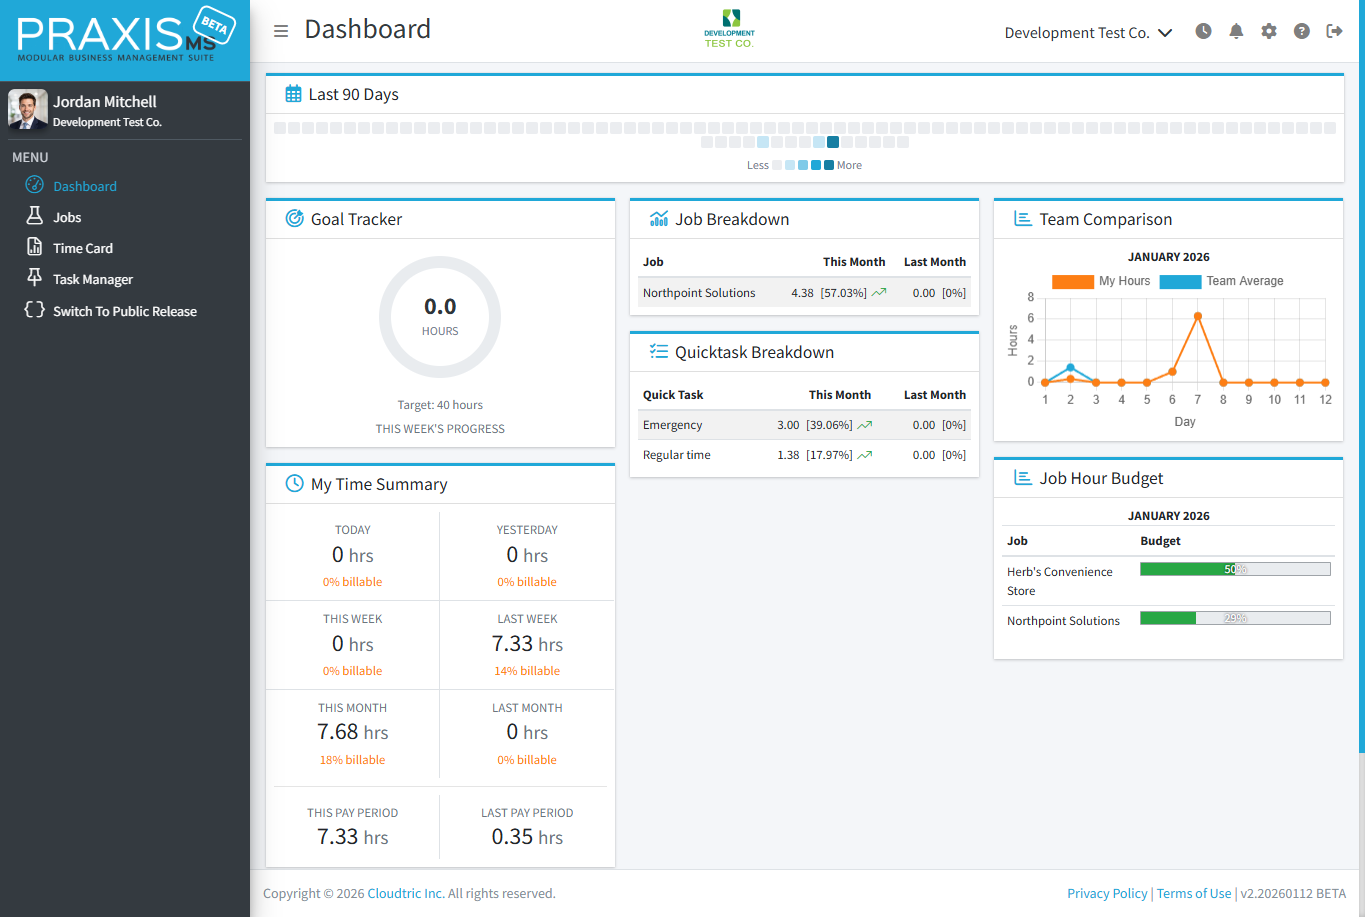
Understanding the Dashboard
The dashboard is your home base in PraxisMS. Here's what each section does:
Dashboard Widgets
| Widget | What It Shows |
|---|---|
| Progress Ring | Your hours worked vs. expected hours for the current period |
| Today's Time | Total hours tracked today |
| This Week | Weekly time summary |
| Pay Period | Hours tracked in the current pay period |
| Active Timer | Shows your running timer (if any) |
Navigation Sidebar
The left sidebar provides access to all PraxisMS features:
- Dashboard - Your home view
- Time Card - View and edit your time entries
- Reports - Generate various reports (admin only)
- Jobs - Manage jobs/projects (if enabled)
- Tasks - Task lists and assignments (if enabled)
- Team - Manage users (admin only)
- Settings - Company configuration (admin only)
Starting Your First Timer
PraxisMS makes time tracking simple. Here's how to start:
Using the Timer Sidebar
The timer sidebar appears on the right side of your screen:
- Click the Start Timer button (or the play icon)
- Select a Quick Task category (e.g., "General Work", "Meeting", "Admin")
- Optionally select a Job if Job Costing is enabled
- The timer starts counting automatically
- When you're done, click Stop
Forgot to start your timer? Don't worry! You can add time entries manually from your Time Card.
Adding Notes
You can add notes to your time entries to describe what you worked on:
- While the timer is running, click the Notes field
- Type a brief description of your work
- Notes are saved automatically
Notes are helpful for job costing reports and keeping track of what you accomplished.
Switching Companies
Some users belong to multiple companies in PraxisMS. If you do, here's how to switch:
- Click your name in the top-right corner
- Look for the Switch Company option
- Select the company you want to switch to
- You'll be redirected to that company's dashboard
Each company is completely separate. Your time entries, permissions, and settings are specific to each company you belong to.
Now that you're set up, explore these guides:
- Time Tracking Guide - Learn all the ways to track time
- Viewing Your Time Card - See and edit your entries
- Understanding Permissions - What you can and can't do